In the domain of home improvement, tracking down the ideal answer for breaks, holes, and blemishes can be an overwhelming undertaking. Enter Gorilla Filler, a flexible and strong filler that has acquired prevalence for its viability in tending to a heap of fix needs.
Whether you’re a carefully prepared Do-It-Yourself fan or a beginner hoping to handle little fixes around the house, understanding how to involve Gorilla Filler for the most extreme impact is fundamental. In this aide, we’ll investigate the intricate details of this astounding item, giving you tips and deceives to accomplish impeccable outcomes.
Understanding Gorilla Filler
Gorilla Filler is an exceptional quality, water-based filler intended to fix and fill holes, breaks, and openings in different surfaces. Its flexibility makes it appropriate for use on wood, mortar, stone, and, surprisingly, metal.
What separates Gorilla Filler is its extraordinary definition, consolidating strength and adaptability to guarantee durable fixes. Before digging into its application, how about we investigate the kinds of Gorilla fillers accessible on the lookout?
Types of Gorilla Filler
- Gorilla Generally useful Filler: Ideal for general fixes on wood, mortar, and brickwork, this universally handy Waterproof Expanding Foam filler gives an astounding bond and can be sanded, painted, or finished once restored.
- Gorilla Epoxy Filler: While managing more huge fixes or holding various materials, Gorilla Epoxy Filler is the go-to decision. It sets rapidly, offering major areas of strength for a sturdy bond.
- Gorilla Wood Filler: Explicitly planned for wood, this filler is ideally suited for fixing openings, gouges, and different blemishes on wooden surfaces. It dries to a characteristic wood to complete the process, making it simple to mix with the current wood.
Now that we have a basic understanding of gorilla filler varieties, let’s delve into the steps to maximize their effectiveness.
Steps to Use Gorilla Filler for Maximum Effect
Step 1: Surface Preparation
Before applying Gorilla Filler, legitimate surface planning is essential for a fruitful fix. Begin by cleaning the region to be filled, eliminating any residue, trash, or free material. Sand the surface tenderly to make an unpleasant surface, advancing a better grip of the filler. For open-air applications, guarantee the surface is dry and liberated from dampness.
Step 2: Mixing the Filler
If you’re using a Gorilla Epoxy Filler, mix the two components according to the instructions provided. For other types of Gorilla Filler, such as the All Purpose or Wood Filler, no mixing is required. These come ready to use, saving you time and effort.
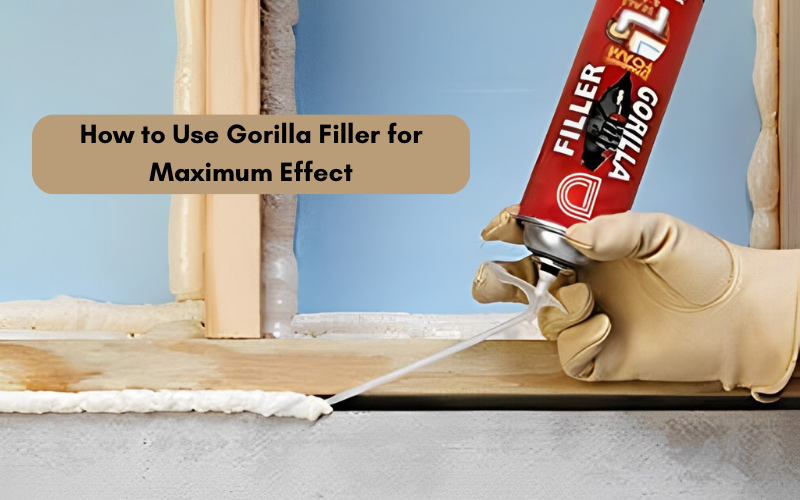
Step 3: Application
Apply the Gorilla Filler generously into the gap, crack, or hole using a putty knife or a spatula. Ensure that the filler is slightly raised above the surface to account for any shrinkage during the drying process. Smooth the filler with the putty knife for an even finish.
Step 4: Sanding
Once the filler has dried completely, usually within a few hours, sand the repaired area to achieve a smooth and seamless finish. Use fine-grit sandpaper to feather the edges and blend the waterproof expanding foam filler with the surrounding surface. This step is crucial for achieving a professional-looking result.
Step 5: Painting or Staining
If your repair involves a visible area, such as a wall or a piece of furniture, consider painting or staining the surface to match the existing finish. Gorilla fillers can be painted or stained once cured, providing a cohesive and aesthetically pleasing appearance.
Step 6: Sealing and Protecting
For outdoor applications or areas prone to moisture, it’s advisable to seal the repaired surface with an appropriate sealer or primer. This additional layer of protection helps prevent water damage and ensures the longevity of the repair.
Check Out This Gorilla Expanding Foam:

Tips for Success
- Work in Small Sections: When dealing with larger repairs, work in small sections to ensure the filler is applied and smoothed before it begins to dry.
- Layering for Deep Gaps: For deep gaps or holes, apply the filler in layers, allowing each layer to dry before adding the next. This prevents sagging and ensures a sturdy repair.
- Clean Tools Promptly: Gorilla Filler is known for its strong adhesive properties, so clean your tools promptly after use to avoid any residue buildup.
- Follow Manufacturer’s Recommendations: Always follow the specific instructions provided by Gorilla for the type of filler you are using. This ensures optimal performance and durability.
Conclusion
Gorilla Filler stands as a reliable ally in the realm of home repairs, offering a simple yet effective solution for a variety of surfaces. By understanding the types of Gorilla fillers available and following the steps outlined in this guide, you can harness the full potential of this versatile product.
Whether you’re filling cracks in the walls, repairing wooden furniture, or bonding different materials together, Gorilla Filler empowers you to achieve maximum impact with minimal effort. So, roll up your sleeves, grab your Gorilla Filler, and embark on a journey to transform your living spaces with confidence.
Read More: 10 Creative Uses For Gorilla Filler


